Purchase Requisition Instruction
Requisitions are the first step in the purchasing process, providing approvers with the necessary information to approve the purchase and the Purchasing Department with the details they need to generate a Purchase Order. Requisitions in ctcLink consist of four basic elements: headers, lines, schedules, and distributions. Each requisition has one header, which can have multiple lines. Each line can have multiple schedules, and each schedule can have multiple distributions. The schedule defines when and where you want the line items delivered. The distribution defines internal accounting information for the schedule, including which accounts and departments should be charged for the goods and services being purchased.
A requisition in ctcLink Purchasing can have one of five different statuses during its life cycle:
- Approved
- Canceled
- Complete
- Open
- Pending Approval
The Requisition page enables you to enter item information, modify lines as needed, establish schedules and distributions, and define internal delivery and accounting information. You can also establish defaults that can improve your efficiency in creating requisitions.
Create Requisition
Navigation: NavBar > Navigator > Purchasing > Requisitions > Add/Update Requisitions
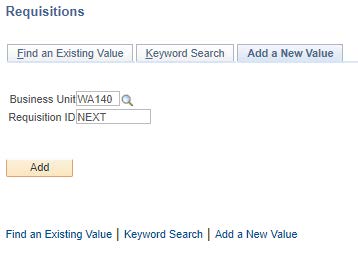
The Requisitions search page displays.
- To create a new requisition, select the Add a New Value tab.
- The Business Unit should default to WA180. (Images shown are from Clark College.)
- Leave the Requisition ID defaulted to NEXT. The system will assign a unique requisition ID once the requisition is created and saved.
- Select the Add button. The Maintain Requisitions page will display.
- In the Requisition Name field, enter the department abbreviation (such as NURS for Nursing) and a short description that will help quickly identify the purpose of the requisition. This field displays for approvers and will be useful when searching for requisitions in the future.
- Under the Header section, the Requester field displays the ID of the person logged into the system and entering the requisition.
- The Requisition Date will default to the current system date, but you can change it if needed.
- The Origin field should default to ONL, indicating the requisition is being generated online.
- The Currency Code field should default to USD.
- The Accounting Date will also default to the current system date. This field determines the open period or allowable open date range for budget checking a requisition. If the requisition's accounting date falls before or after the open period date range, the system provides a message or warning to prevent you from running budget checking.
- The Requisition Defaults link can be used to improve efficiency for multi-line purchase requisitions by
eliminating the need to re-enter chartfield details and other information required for each line. The
information entered through this link will default to all lines entered on that purchase requisition.
Please review the steps under the Details section below to understand the significance of each field
included in the defaults.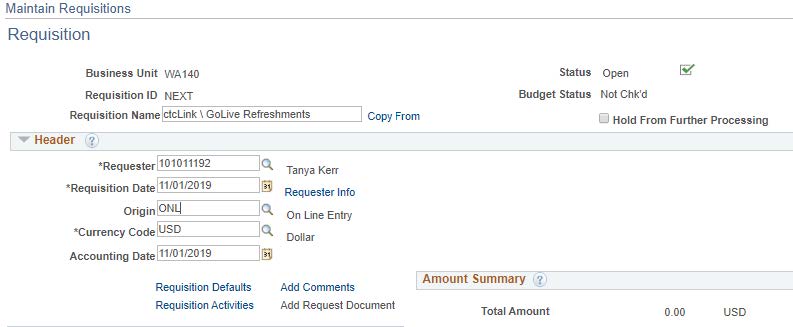
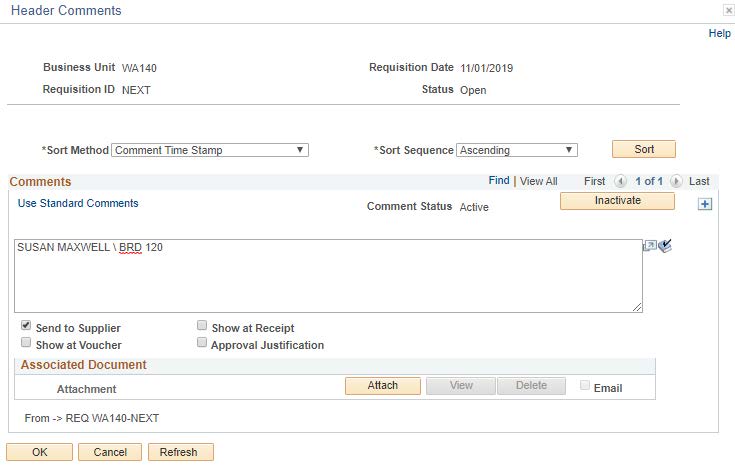
- Select the Add Comments link, and the Header Comments section will display
- In the Comments section, enter the employee name and mailstop that the goods should be delivered to along with any other special delivery instructions.
- Check the Send to Supplier checkbox. This enables the information entered in the comments section to be printed on the purchase order after it is created.
- If there is a quote or other scanned documentation that needs to be submitted with the requisition, it can be attached by selecting the Attach button. You will be prompted to browse to the location where the attachment saved and then upload that document. Attachments will be viewable by approvers and the Purchasing Department.
- Select the OK button to return to the Maintain Requisitions page.
- The Add Items From section contains four links to functions that are not currently being utilized, so
this section should be ignored.

- Go to the Requisition Line subsection and select the Details tab. Selecting the Details icon
 provides separate screen where you can more easily review the line information from
the various tabs AFTER it has been entered. This page can’t be used to enter all of
the necessary line information.
provides separate screen where you can more easily review the line information from
the various tabs AFTER it has been entered. This page can’t be used to enter all of
the necessary line information. - The Item field should be left blank. This field is NOT used for the vendor’s item number or SKU. This is a globally configured field that is not user friendly and contains information that does not need to be entered at the requisition stage.
- The Description field should be used to enter the vendor item numbers, part numbers, model numbers
or SKU if known, or a brief description of the item. This field has a 254 character
limit. Please use the Thought Bubble icon
 to enter the vendor information and a description of the item along with any additional
information that needs to be communicated to Purchasing.
to enter the vendor information and a description of the item along with any additional
information that needs to be communicated to Purchasing. - Enter the desired amount into the Quantity field.
- The UOM field is required and allows you to select the appropriate unit of measure for the line.
- Enter the Category code that most closely aligns with the item being purchased. Selecting the magnifying glass will allow you to search either by the Category ID or by the Description. Changing the Description dropdown box to “Contains” will allow you to search for a key word(s) anywhere in the description. If you are unable to find a suitable Category code, you should select UNC – Uncategorized.
- Enter the price per unit in Price field and the Merchandise Amount will automatically calculate.

- Select the Ship To/Due Date tab. The key fields you have already entered or skipped will automatically populate.
- The Due Date field should be used to communicate when you need the item.
- The Ship To field should default to 150-000001 which is the code for Central Receiving. There
is no need to change this field. Remember any specific delivery instructions should
be included with the employee name and mailstop entered in the comments in step 13
above.

- You do not need to enter any additional information on the Status, Supplier Information, Item Information, Attributes, Contract or Sourcing Controls tabs.
- If you need to add or delete additional lines to the requisition, select the add/delete
icons to the right.

- Return to the Details tab.
- Select the Schedule Icon
 button to access the Schedule page, where you can view shipment details and distribution
information for each line item.
button to access the Schedule page, where you can view shipment details and distribution
information for each line item.
- On the Schedule page, the fields all default based on previous information entered
above. You do not need to change any of these fields.
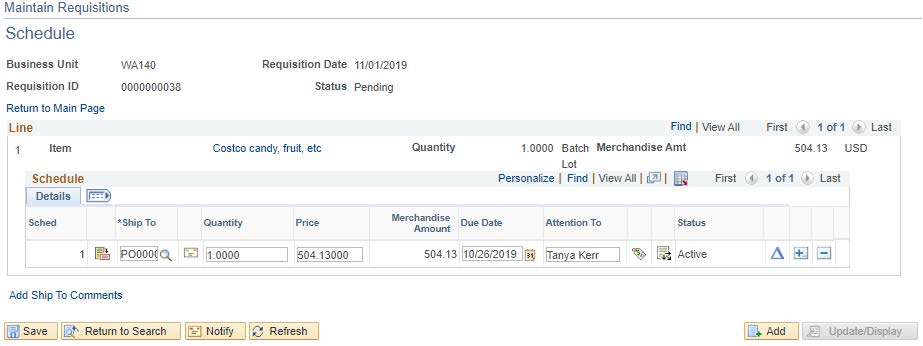
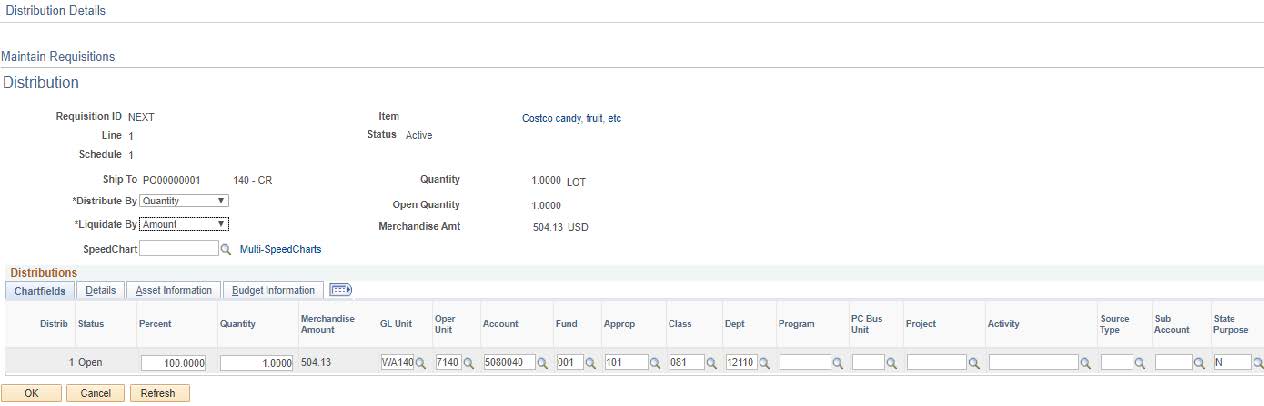
- Select the Distribution Icon button on right hand side.

- The Distribution page is where you will enter the necessary budget information to determine how and where the cost of item will be charged. The Distribute By field will default to amount but can be changed to quantity if appropriate. This is only relevant if the cost of the line item is being allocated between multiple budget accounts.
- The Percent field allows you to allocate the line item expense to multiple budget accounts. The sum of the line distribution percentages must equal 100 percent.
- There are seven required fields on the Chartfields Tab:
- GL Unit – must always be set to WA150
- Account – defines the type of expense and replaces the old sub-object codes (EA or JA for example)
- Oper Unit – must always be set to 7150
- Fund – generally the same except for fund 101 which is now Fund 001 and Appropriation 101
- Dept – replaces the Org in the old budget number
- Class – replaces the Program in the old budget number
- State Purpose – this field is mandated by the state to track IT-related purchases. You must select
Y/N.
**Tip – you can enter the chartfield information on the Requisition Defaults page available under
the Header section at the top of the PO. Doing that will then default that information to ALL lines of
the requisition. If you do have different budget information for each line, then you will need to
make sure it is entered separately.
- You do not need to enter any additional information on the Details, Asset Information or Budget Information tabs.
- Select the OK button. The Schedule page will display.
- On the Schedule page, select the Save button. The Requisition page will display.
- On the Requisitions page, you can click the Save button at any time to avoid losing your work. After you save the requisition, a Requisition ID will be populated. DO NOT CHANGE this field.
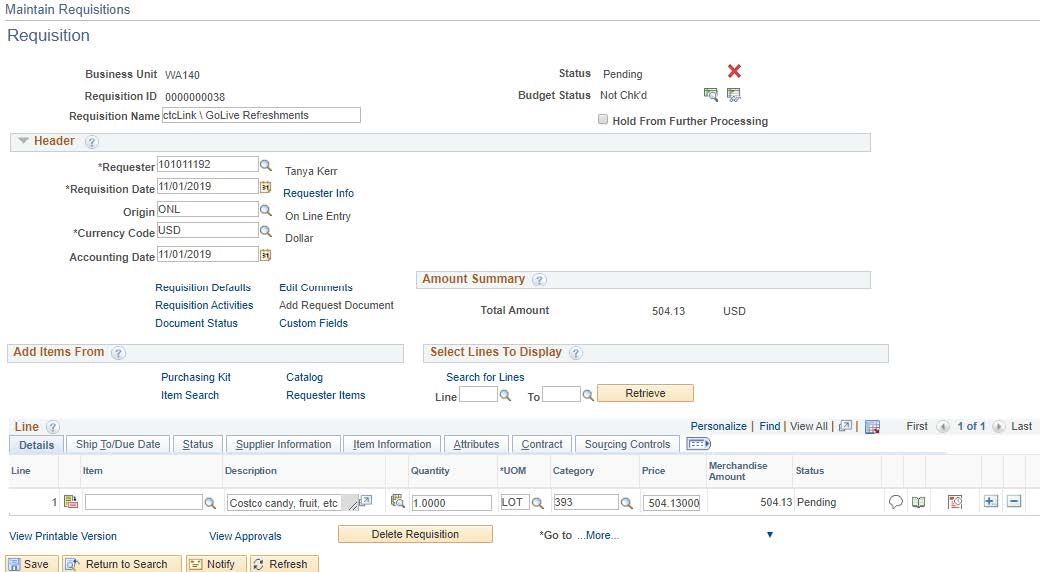
- After you have entered all the necessary information and are ready to submit the requisition
for approval you should select the green check mark to the right of the Status field to Submit For Approval.
 Once submitted, the Status field will change to Pending.
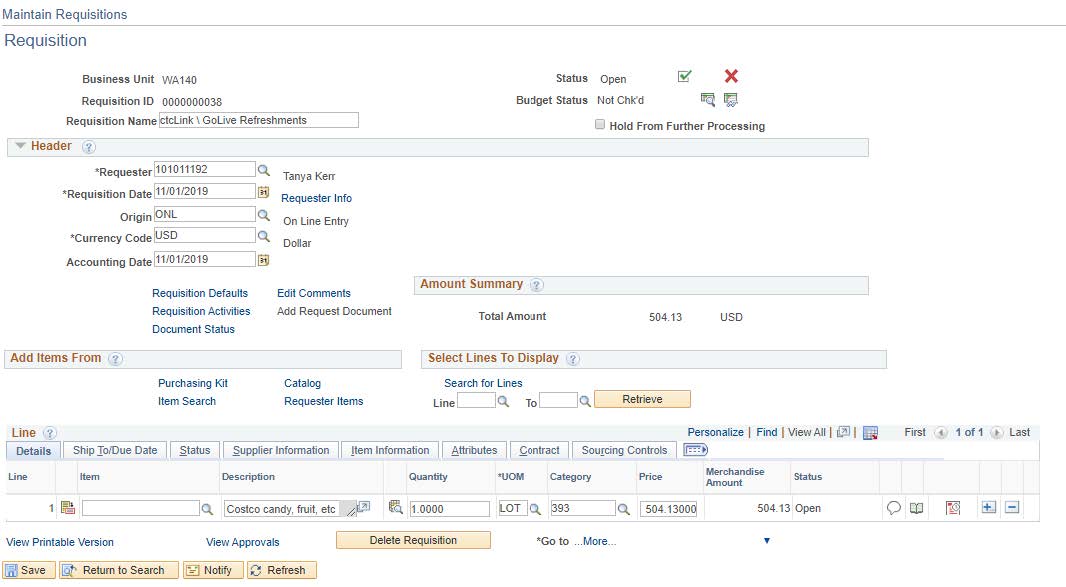
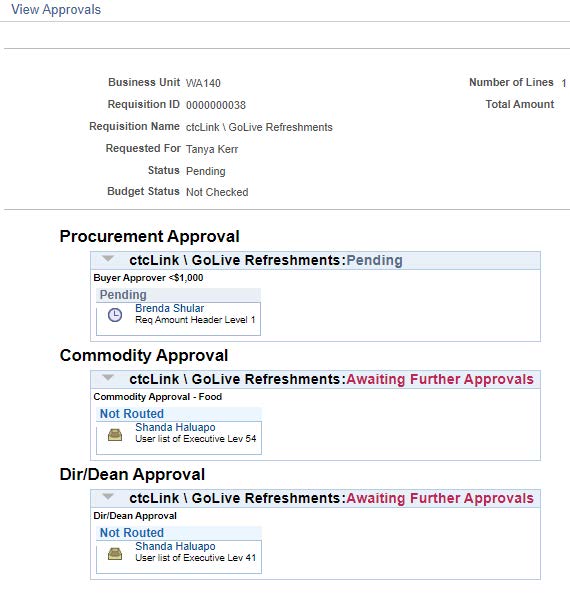
- You can select the View Approvals link at the bottom of the page to display the approval hierarchy that the purchase
requisition will go through. You can go back into the requisition at any time to see
where it is in the process.
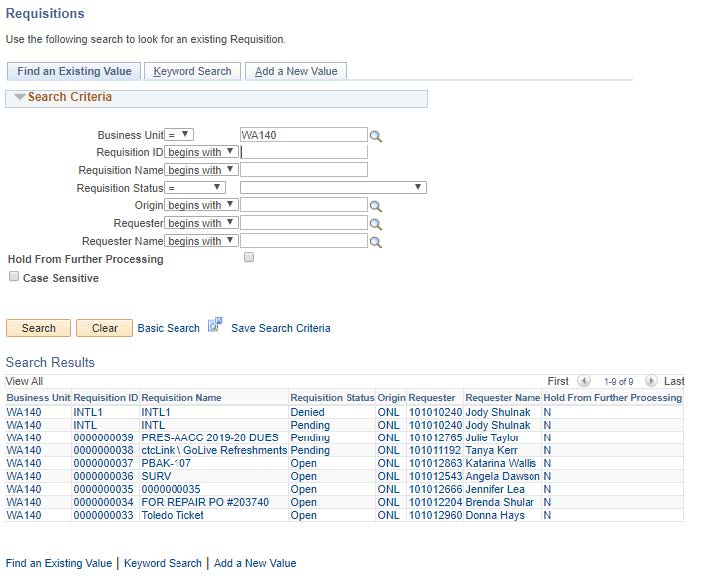
Searching for a Requisition
Navigation: NavBar > Navigator > Purchasing > Requisitions > Add/Update Requisitions
If you need to search for a requisition at any point in the future, select the Find an Existing Value tab. Select Business Unit WA140 and then you can search by entering any of the identifying fields and selecting the Search button.